The first time I saw the newspaper ask, I thought it was too much. Wrap a bunch of grocery-store ranunculus in a printed front page, hand it over, watch your friend read the headline. I rolled my eyes at the pin. Then I made one for Priya, who has known me since we were nine, and I teared up before she even opened it. So. I was wrong.
Here is the thing about this particular ask. It photographs better than it should. The flowers do half the work, the headline does the other half, and you barely have to spend anything if you already own a printer that does not hate you. Mine hates me. I print the dark stuff at the FedEx on Calhoun and just deal with it.
Below are the templates and little add-ons I actually pulled together for this, plus a couple I bought after the fact and wished I had grabbed sooner. I print one test page on plain paper, hold it at arm’s length, and if the headline reads from there it goes on the good stock. A few of these links are affiliate links, so if you grab one a little something comes my way. Doesn’t cost you a thing.
Heads up, some links here are affiliate links. Grab a template through one and I get a small cut, no extra charge to you.
The candle I slipped in next to the flowers
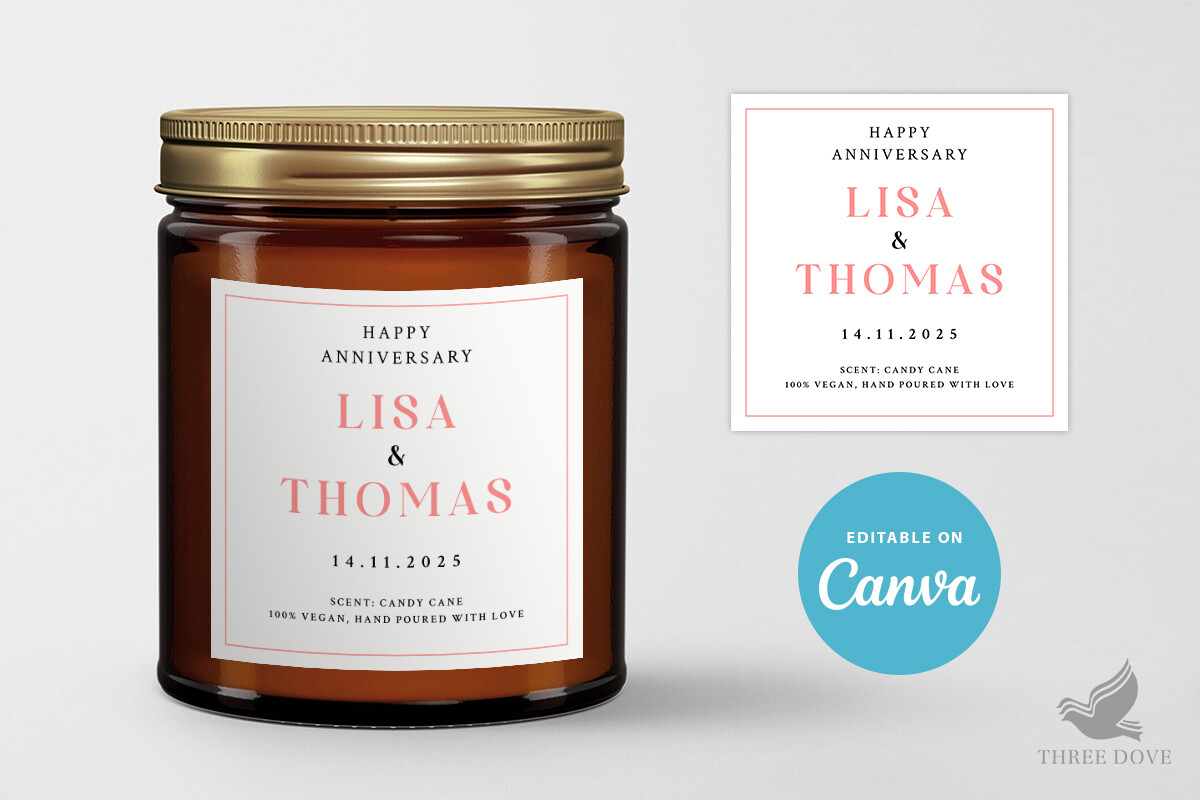
I did not want the newspaper bouquet to be the whole gift, so I tucked a small candle in the crook of Priya’s arm when I handed it over. This label went on it. You type her name and a date in, the layout holds, and it does not slide around when you change the wording to something dumb and inside-jokey, which I did.
I printed it on a sticker sheet at home, peeled it, and wrapped it around a plain jar candle from the grocery store. Looked like I spent real money. I did not.
One gripe. The label is sized a hair narrow for a wide three-wick jar, so I had to bump it up about eight percent before it wrapped all the way. Took me one ruined sticker to notice. Measure your jar first.
A second label, because I always make two of everything
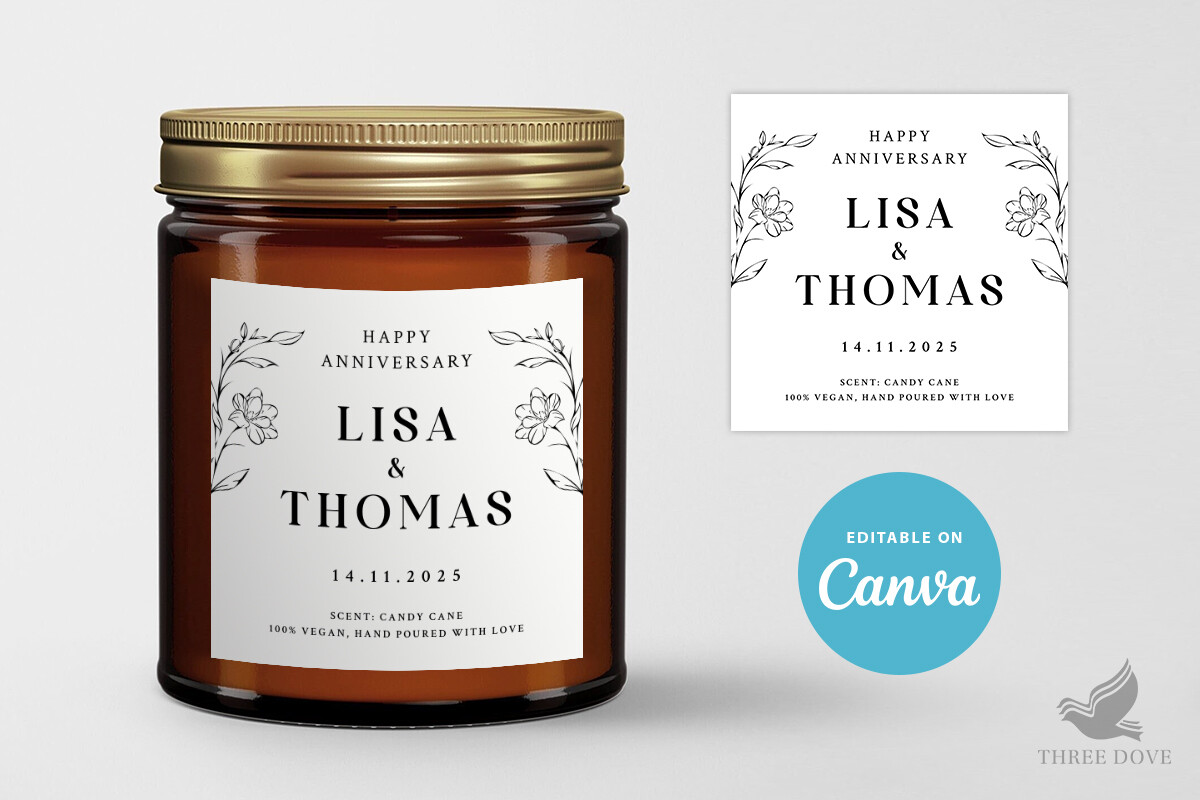
When I do these asks for more than one friend I batch them, and I never trust a single label design to fit every jar in my cabinet. This is the other one I keep on hand. Softer type, a little more room around the edges, friendlier to the squat candles you find at the discount place.
I edited the names for three different bridesmaids in about ten minutes, printed all three at once, and lived with them taped to my kitchen window for a day before committing. Cardstock-weight sticker paper, the matte kind, not glossy. Glossy fingerprints show.
The catch here is the font ships thin. In my dim kitchen it nearly disappeared, so I cranked the weight up one notch before the real print run. Cheap fix.
The planner I handed her once she said yes
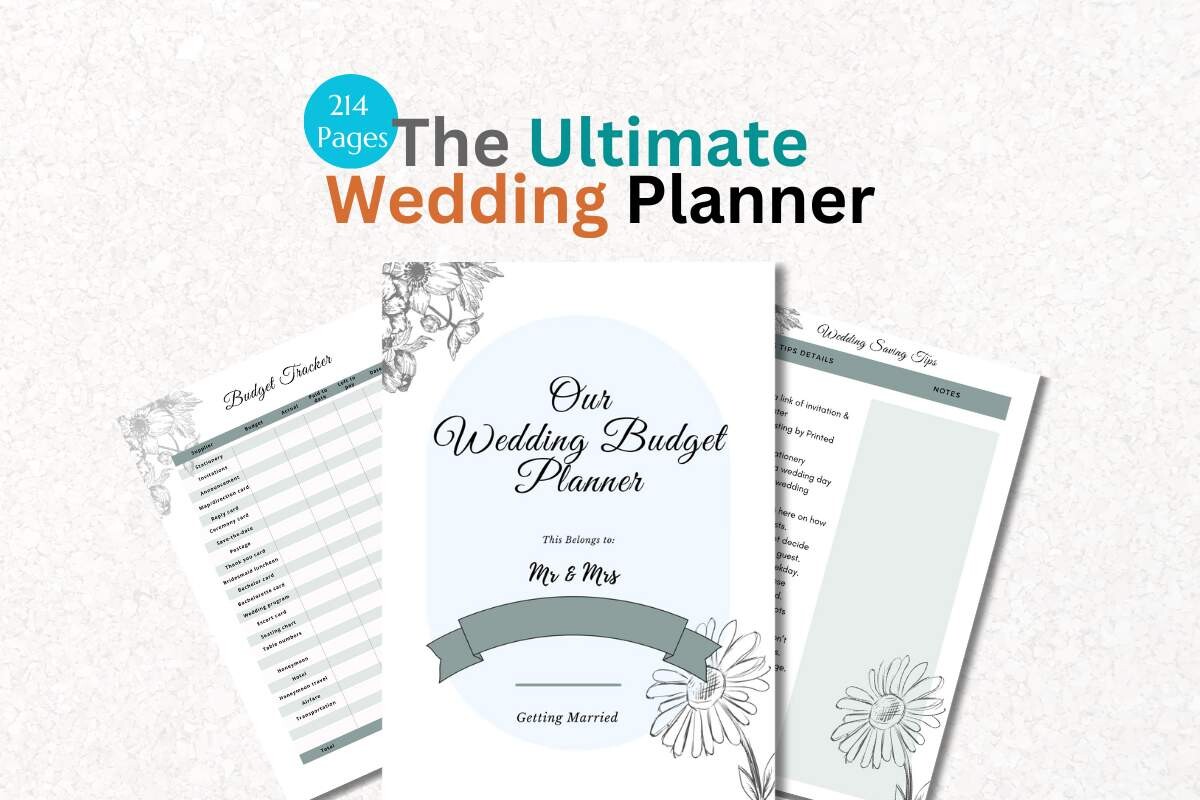
After the dramatic flower moment, I gave Priya something useful. This planner. She is the bridesmaid who actually wants tasks, so a place to write down dress fittings and who is splitting the bachelorette Airbnb felt right. I opened it in Canva, swapped the cover color to match her dress, and printed the first ten pages at the copy shop because my home printer streaks anything past gray.
I also kept a copy for myself, honestly. The checklist pages saved my own sister’s shower last spring.
My one complaint is it runs long. There are pages in here I will never touch, like a full seating-chart section a bridesmaid does not need. I just printed the parts I wanted and skipped the rest. No harm done.
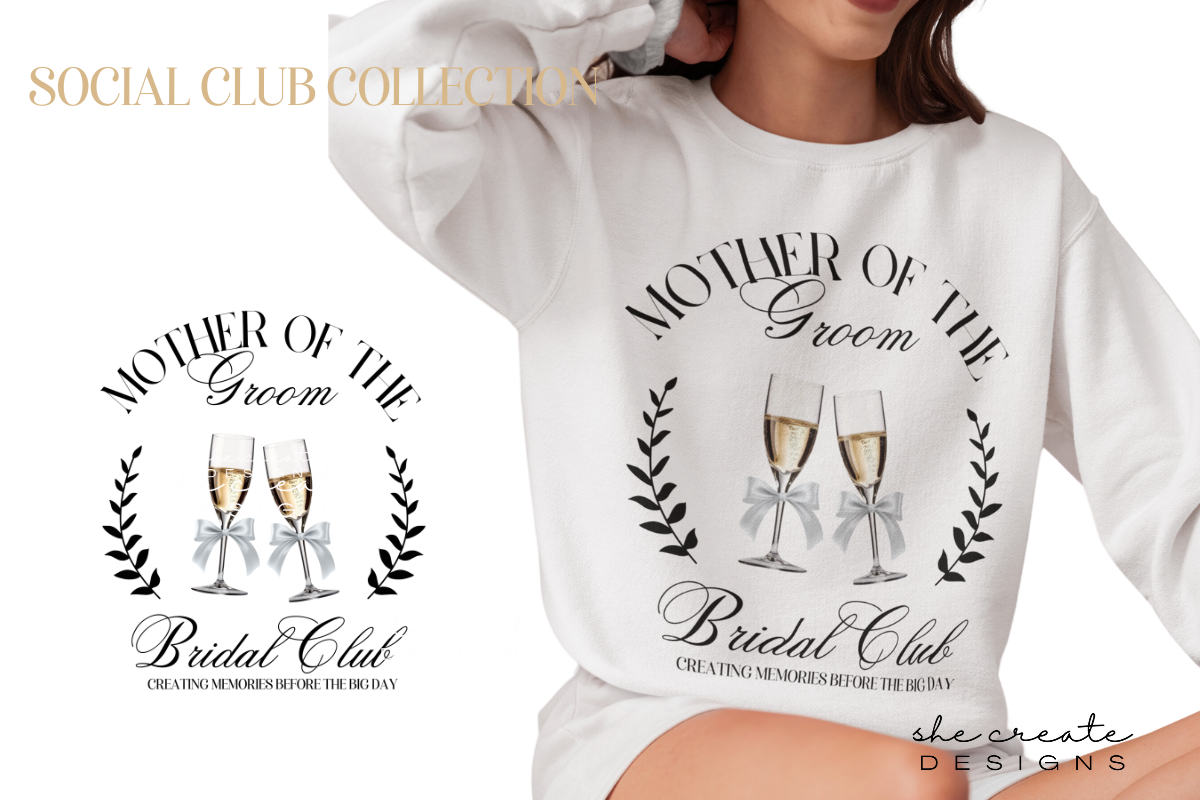
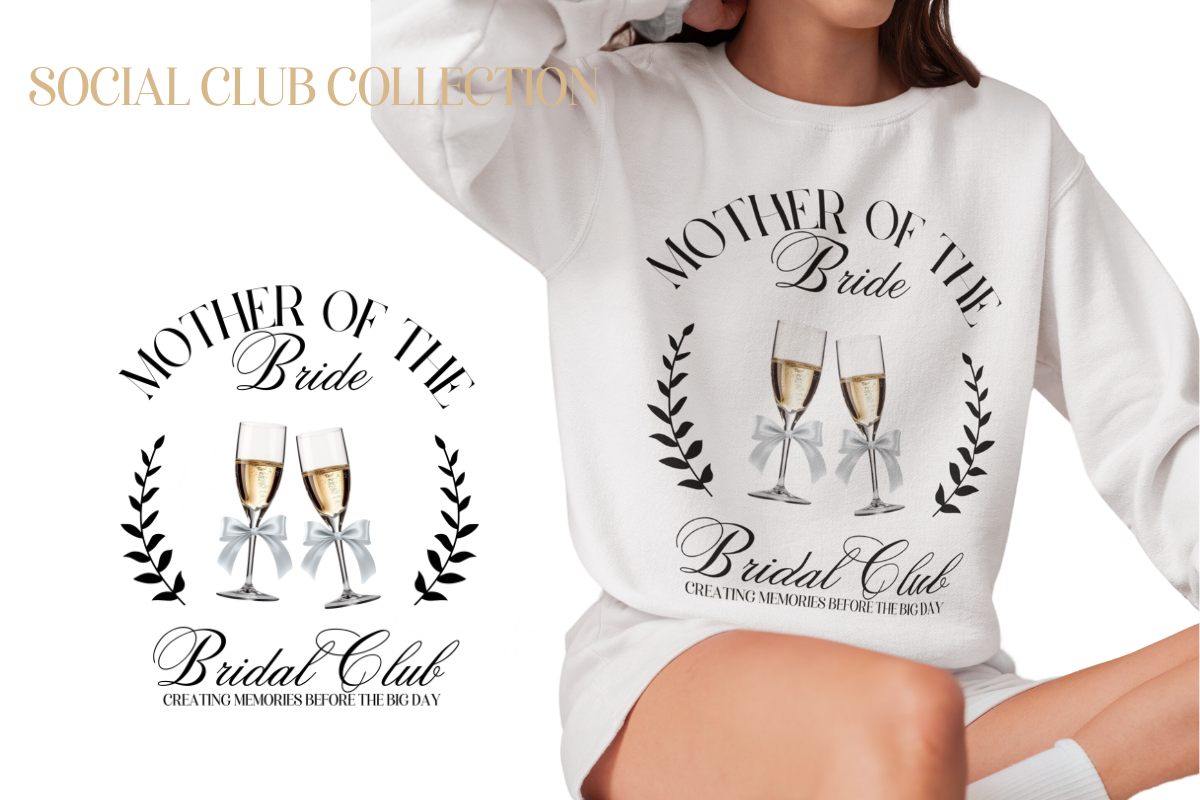
The clubhouse graphic that started the whole theme

Somewhere in planning Priya’s ask I decided the bridesmaids needed a fake club. A bridal party social club. This PNG is the one I built the rest around. I dropped it on a tote bag through one of those print-on-demand sites and gave it out the day everyone said yes.
It came back from the printer cleaner than I expected, sharp edges, no weird halo around the letters. I have ordered transfers that bled. This one did not.
The nitpick. It is a flat PNG with a transparent background, which is great until you put it on a dark tote and realize the dark ink in the design vanishes. I switched to a cream bag and it popped. Check your bag color first, learn from me.
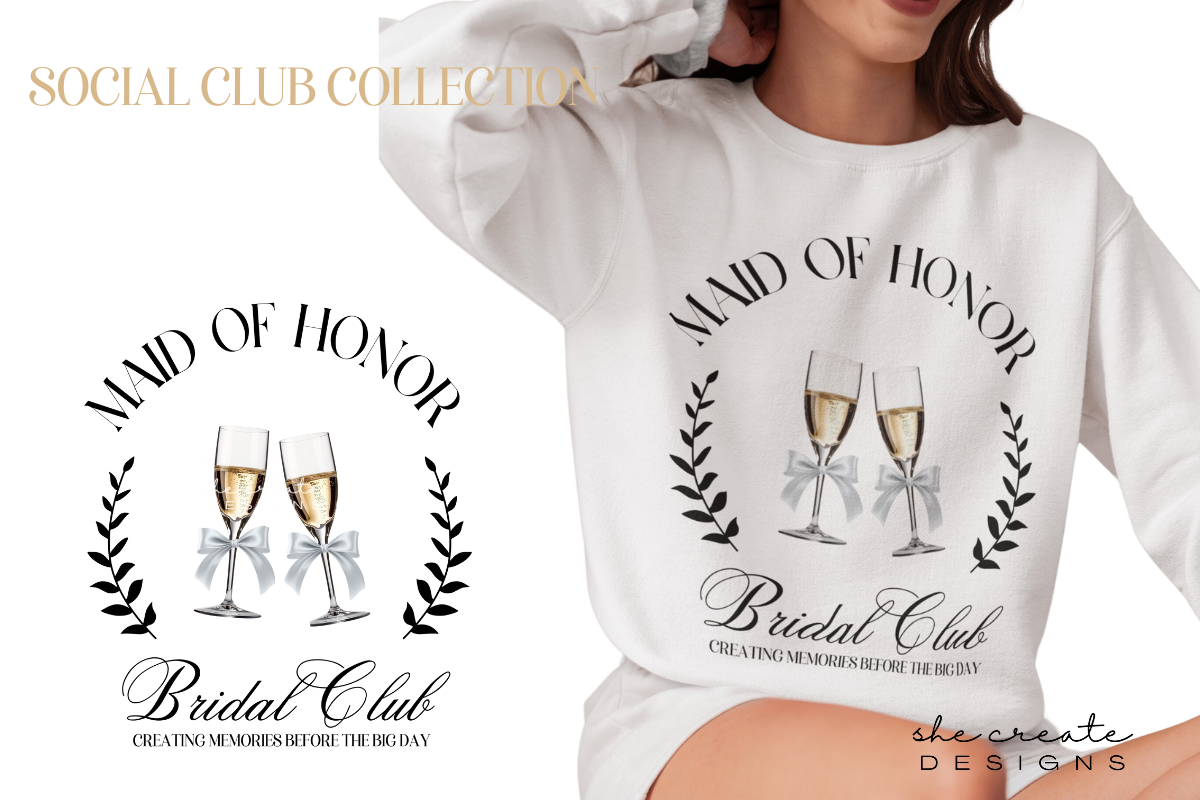
A different club badge for the matching mugs
Once I had one club graphic I wanted a few variations so the set did not look like a single sticker copied around. This is the one that ended up on coffee mugs for the morning-after brunch. Different layout from the tote version, a touch more compact, sat nicely on a curved surface.
I sent it to a local mug printer over on Dell Range, picked them up Friday, filled them with cheap champagne Saturday. Everyone kept theirs.
What I would flag is the resolution. Blown up to a big tote it was fine, but the printer told me to keep it under a certain size or it would soften. On a mug, no issue at all. Ask your printer for their minimum and you are set.
The version I printed as a little card for the bouquet
Not everything needs a mug. For two of the bridesmaids who live out of state I mailed the newspaper-wrapped flowers, and I slid this graphic in as a small printed card so the club theme traveled with it. I shrank it down, printed it four-up on a sheet, and cut them apart with a paper trimmer.
The lines stayed crisp even tiny, which I did not expect from a design built for bigger stuff.
My gripe is mild. There is a lot of empty space around the art that I had to crop in tight before it looked like a card and not a graphic floating on a page. Two minutes in any editor. Then it was clean.
The last badge, the one on the tissue paper
For the final touch I wanted the inside of the flower wrap to feel finished, so I printed this graphic faintly across plain tissue paper and rolled the bouquet in that under the newspaper. When Priya peeled back the headline, there it was again. Small payoff. She noticed.
I ran it through an inkjet on the lowest tissue-friendly setting, fed one sheet at a time, and only jammed the printer once. A personal record.
The honest catch is tissue paper and home printers barely get along. Half my sheets wrinkled and I tossed them. Buy more tissue than you think you need, feed slow, and accept that a few will die. Worth it for the reveal.
Things Brides Email Me About
What is the bridesmaid newspaper proposal?
Short answer, it is the one where you wrap a bouquet in a printed front page that asks your friend to be a bridesmaid. The headline does the asking. Something like a fake newspaper announcing the engagement with her name in it.
I brushed it off as a gimmick until I made one. Then my friend read the headline standing in a parking lot and cried before she even saw the flowers. So I take it seriously now.
How do I make the newspaper template?
Honestly, you do not draw it from scratch unless you hate yourself. I grabbed an editable layout, typed in our names, the date we met, a couple of fake captions that only she would get, and called it done in an evening on my couch.
The part that took longest was resisting the urge to add five fonts. I used two. Print a test page on plain paper before you commit, hold it across the room, and if the headline reads from there you are good.
What paper should I print it on?
I learned this the hard way. The first one I did on thick cardstock and it would not wrap around the stems, it just cracked at the fold. Newsprint is supposed to be thin.
Now I print mine on regular copy paper or, if I want it to feel more real, a lightweight off-white sheet from the craft store. Thin folds soft, holds the flowers, looks the part. Save the heavy cardstock for the candle labels instead.
Before You Commit to a Template
I still have the test page from Priya’s ask stuck to my fridge with a magnet from a pizza place that closed. It is crooked and the ink is a little light because my printer was sulking that night. I keep it anyway.
If you make one of these, do the boring test print first and check your jar and tote colors before you commit to the real run. That is most of the battle. The flowers and the headline do the rest, and your friend will not care that you fed the tissue paper through one sheet at a time at midnight. I promise she will not.